
Comprehensive Guide to Cleaning and Maintaining Your Gas Stove
A gas stove is an indispensable appliance in many households, offering precise temperature control and efficient cooking. To ensure its longevity and optimal performance, regular cleaning and proper maintenance are essential. This guide provides detailed steps and tips to keep your gas stove in pristine condition.
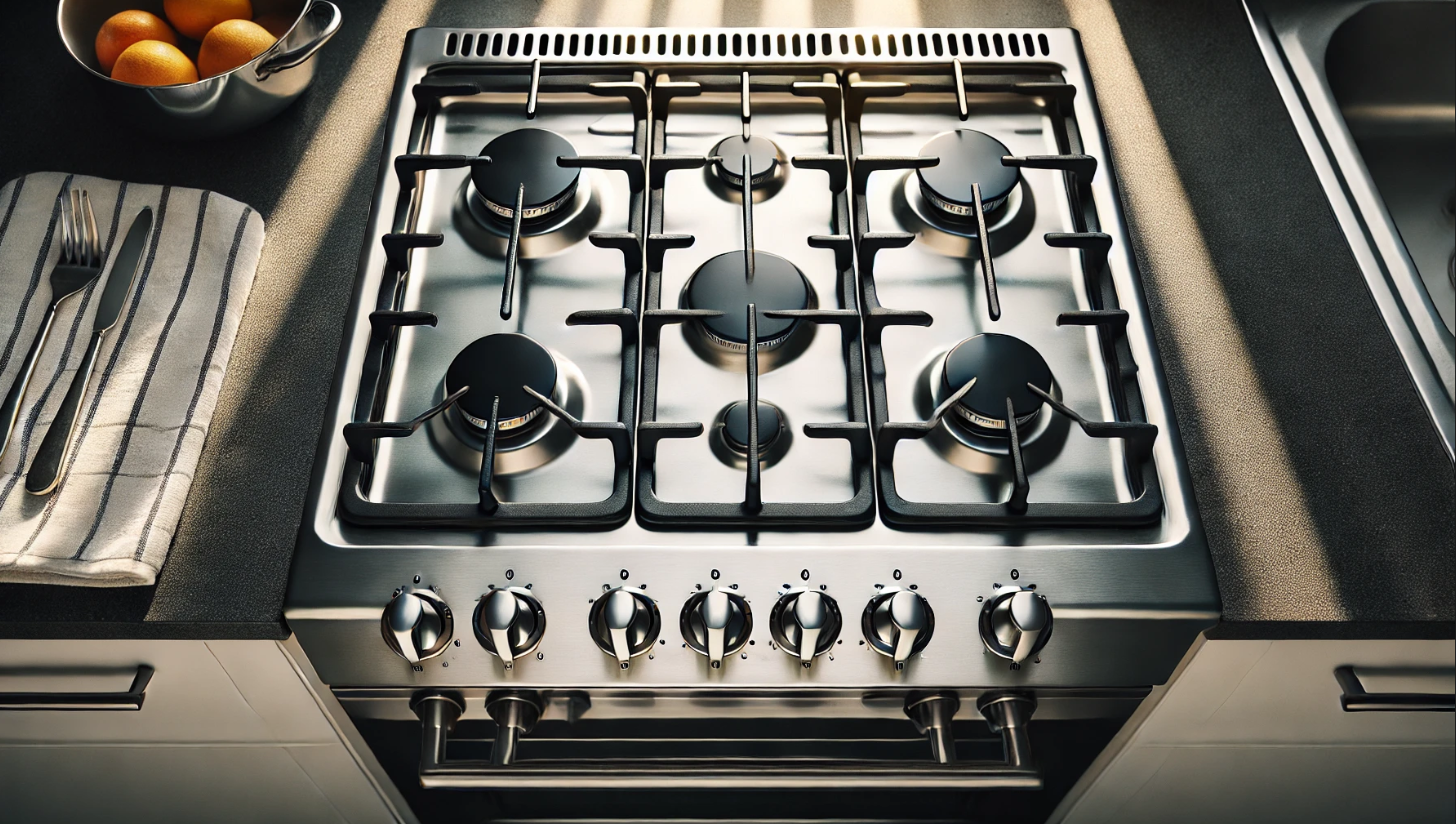
Understanding the Components of a Gas Stove
Before delving into the cleaning process, it’s crucial to familiarize yourself with the main parts of your gas stove:
- Burners: Where the flame emerges to heat your cookware.
- Grates: The removable frameworks that support pots and pans above the burners.
- Control Knobs: Dials used to adjust the flame intensity.
- Drip Pans or Spill Trays: Located beneath the burners to catch spills and food debris.
- Ignition System: Either electric or manual, responsible for lighting the gas.
Understanding these components will help you approach the cleaning process methodically.
Daily Cleaning Routine
Implementing a daily cleaning routine can prevent the buildup of grime and ensure your stove remains hygienic.
1. Post-Cooking Wipe Down
- Wait for Cool Down: After cooking, allow the stove to cool to a safe temperature.
- Surface Cleaning: Use a soft cloth or sponge dampened with warm, soapy water to wipe the stovetop, grates, and control knobs. This removes fresh spills and prevents them from hardening.
- Drying: After wiping, use a dry cloth to remove any moisture, preventing water spots and rust formation.
2. Burner Maintenance
- Inspect Burners: Ensure that burner ports (the small holes where flames emerge) are free from food particles.
- Cleaning Clogged Ports: If you notice uneven flames, it may indicate clogged ports. Gently use a soft brush or a toothpick to clear any obstructions. Avoid using sharp objects that could damage the burner.
Weekly Deep Cleaning
A more thorough cleaning should be performed weekly to maintain the stove’s efficiency and appearance.
1. Disassembling Removable Parts
- Remove Grates and Burners: Carefully lift off the grates and set them aside. Depending on your stove model, burners may also be removable.
- Detach Control Knobs: Most control knobs can be pulled straight off for cleaning. Check your stove’s manual to confirm.
2. Soaking Components
- Prepare Cleaning Solution: Fill a basin with hot water and add a few drops of mild dish soap.
- Soak Parts: Place grates, burner caps, and control knobs into the solution. Let them soak for 15-20 minutes to loosen grease and grime.
3. Scrubbing and Rinsing
- Scrub Components: Use a non-abrasive scrub brush or sponge to clean each part thoroughly. For stubborn stains, a paste made of baking soda and water can be effective.
- Rinse and Dry: After scrubbing, rinse all parts with clean water and dry them completely with a soft cloth to prevent rusting.
4. Cleaning the Stovetop Surface
- Surface-Specific Cleaners: Depending on your stove’s surface material (stainless steel, enamel, glass), choose an appropriate cleaner. Avoid abrasive materials that can scratch the surface.
- Wipe and Polish: Apply the cleaner with a soft cloth, following the product instructions. Buff the surface to a shine, ensuring no residue remains.
5. Reassembling the Stove
- Replace Components: Once all parts are dry, reassemble the burners, grates, and control knobs. Ensure each piece is securely and correctly positioned.
Monthly Maintenance Checks
In addition to regular cleaning, monthly maintenance helps in identifying potential issues before they escalate.
1. Inspecting Gas Lines and Connections
- Visual Inspection: Look for signs of wear, corrosion, or damage on gas lines and connections.
- Leak Test: Apply a soapy water solution to connections and turn on the gas (without lighting the stove). If bubbles form, this indicates a gas leak. In such cases, turn off the gas supply immediately and contact a professional technician.
2. Evaluating Ignition Systems
- Electric Ignition: Ensure that the ignition clicks and lights the burner promptly. Delays or failures may require professional servicing.
- Pilot Light (for older models): Confirm that the pilot light is steady and blue. A yellow or flickering flame may indicate issues that need attention.
Tips for Specific Stovetop Materials
Different materials require tailored care to maintain their appearance and functionality.
1. Stainless Steel Surfaces
- Avoid Abrasives: Use non-abrasive cleaners to prevent scratches.
- Polishing: Wipe along the grain of the steel to maintain its natural luster.
- Fingerprint Prevention: Consider using a stainless steel polish that leaves a protective layer, reducing fingerprint marks.
2. Enamel Coated Surfaces
- Gentle Cleaning: Use mild cleaners to avoid damaging the enamel coating.
- Stain Removal: For tough stains, a baking soda paste can be applied, left for a few minutes, then wiped clean.
3. Glass or Ceramic Surfaces
- Specialized Cleaners: Utilize cleaners specifically designed for glass or ceramic stovetops.
- Avoid Heavy Pots: Be cautious with heavy cookware to prevent cracks or scratches.
Safety Precautions
Maintaining safety during cleaning and operation is paramount.
Gas Supply: Always ensure the gas supply is turned off before disassembling any stove parts.
Ventilation: Keep the area well-ventilated during cleaning to disperse any fumes from cleaning agents.
Protective Gear: Wear gloves to protect your hands from harsh cleaning chemicals and prevent skin irritation.
Natural Cleaning Alternatives
For those who prefer eco-friendly cleaning methods, several natural solutions effectively clean a gas stove without harmful chemicals.
1. Baking Soda and Vinegar
- For Surface Cleaning: Sprinkle baking soda over greasy areas and spray white vinegar. Let the mixture sit for 10–15 minutes before scrubbing with a sponge.
- For Burner and Grate Cleaning: Create a paste with baking soda and water, apply it to the components, and rinse thoroughly after scrubbing.
2. Lemon and Salt Scrub
- Grease Removal: Cut a lemon in half, sprinkle salt on the cut side, and use it as a natural scrubber for grates and stove surfaces. The acidity of the lemon breaks down grease while salt acts as an abrasive.
3. Hydrogen Peroxide and Baking Soda
- For Stubborn Stains: Mix hydrogen peroxide with baking soda to form a paste. Apply to burnt-on food or grease, let it sit for 20 minutes, then scrub clean.
Preventative Measures for a Cleaner Stove
Maintaining a clean gas stove requires consistency. Implement these preventative measures to reduce buildup:
- Use Splatter Guards: Prevent grease and food splashes when frying or cooking with high heat.
- Wipe Spills Immediately: Cleaning up spills as soon as they happen prevents them from hardening and becoming difficult to remove.
- Keep Cookware Bottoms Clean: Greasy pans transfer residue to stove grates, so always wipe the bottom before placing them on the stove.
- Cook with Lids On: Reducing splatter by covering pots and pans helps minimize messes.
Conclusion
Regular cleaning and maintenance of your gas stove not only enhance its appearance but also improve its efficiency and longevity. By following these structured steps—daily wipe-downs, weekly deep cleaning, monthly maintenance checks, and using natural alternatives—you can keep your stove in top condition. A well-maintained stove ensures safer cooking, better performance, and a more enjoyable kitchen experience.
Now that your gas stove is sparkling clean, make it a habit to maintain its condition with these practical tips. With minimal effort, your stove will remain a reliable and hygienic part of your kitchen for years to come.